Bleed & Crop Marks
Adding Bleed to Your Print-Ready File
Watch the following video to learn how to add bleed to your print-ready file.
What is Bleed? Why Does it Matter in Printing?
In online printing, a bleed is printing that goes beyond the edge of the sheet after trimming. It is part of the background that will be trimmed off after the file is printed and cut down to the finished size. The bleed is an area where the document image is extended from one side of the paper to another without design elements or content in it.
If bleed lines for printing are not included in the document set up and your print-ready file, there is a good chance that there will be a gap between the edge of the printed area and the cut line. This happens because there is a tolerance when cutting the printed piece. View the cutting tolerance page for more information on how cutting tolerance may affect print work.
This article explains how to set up proper bleed and crop marks, why safety margins and border thickness matter and how to configure bleed settings in InDesign, Illustrator and Photoshop to avoid trimming errors.
Why You Need Artwork Borders for Printing
Smartpress’ online printing services makes it easy to add bleed lines and borders. Begin designing your artwork with a minimum safety bleed margin of 0.125″. If you add a border to your artwork, however, it is essential that your safety margin instead be 0.25″ to maintain border consistency on all sides.
Border thickness is important because if it is too thin, the border may look uneven after cutting. The thicker the border, the better the results. The cutting tolerance is 0.125″, and for smaller pieces, the shift in cutting tolerance will be more likely and more noticeable.
What Bleed Size Do I Use for Printing?
Setting up bleeds in major design programs like InDesign, Illustrator or Photoshop is simple. Bleeds of 0.125″ are required on anything small like business cards, flyers, brochures, sell sheets, newsletters or booklets. For larger items such as custom signs, posters and trade show graphics, bleeds of 0.25″ are needed.
What are Crop Marks? Why Do They Matter in Printing?
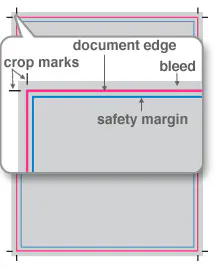
What are crop marks? They’re printer’s marks that need to be included on all four corners of the document for your online printer. The bleed on this 8.5″ x 11″ document is 0.125″. The edge of the document is shown with the pink outline (please do not include this in actual file).
The safety margin, shown in blue, is 0.125″ from the edge of the document. It is important there is no information outside the safety margin.
Correct Document Setup Using Bleed & Crop Marks
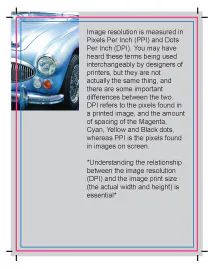
- Image goes to the edge of the bleed.
- The text is positioned in the safety margin.
- None of the important information will be trimmed off.
Incorrect Document Setup Using Bleed & Crop Marks
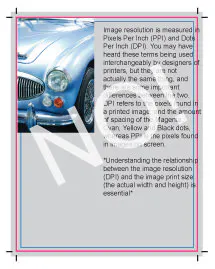
- The image does not go to the edge of the bleed.
- There may be a blank line of the edge of the printed piece.
- The text extends into the bleed area, so it will be trimmed off and unreadable.
Incorrect Document Setup Using Bleed & Crop Marks
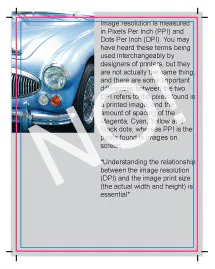
- The image goes to the edge of the bleed, however text extends outside of the safety margin, so it will most likely be trimmed off and unreadable.
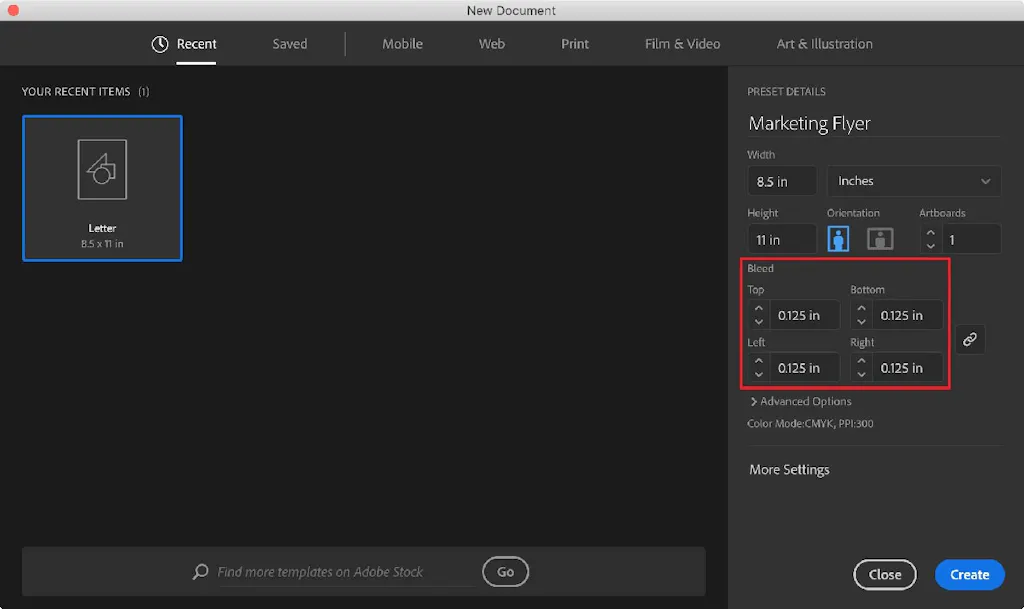
Where to Find Bleed Setup in Illustrator
Where to Find Bleed Setup in InDesign
When creating a new document, expand the Bleed and Slug section to find the bleed options.
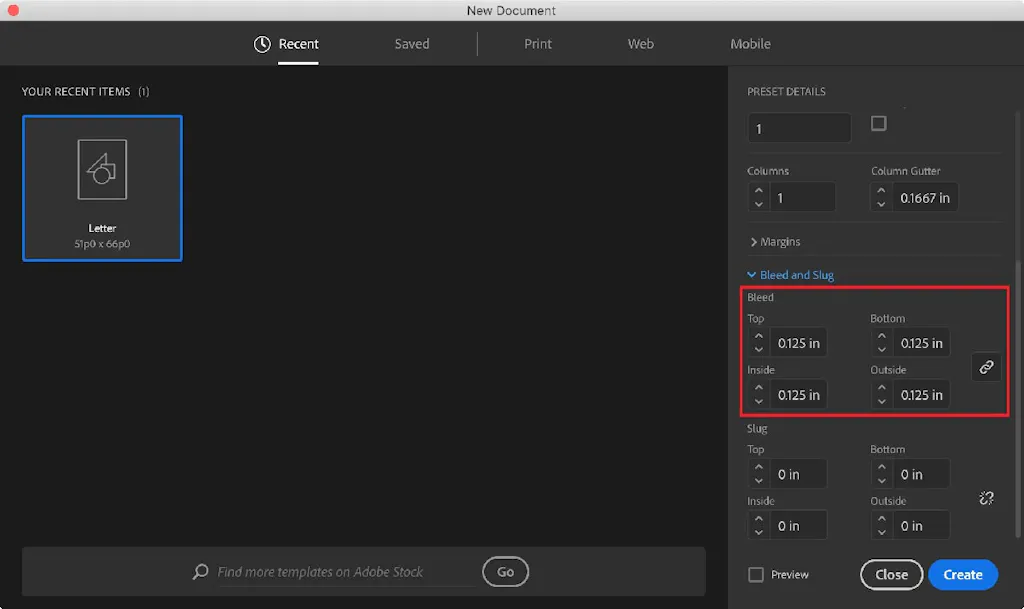
Smartpress Tip: InDesign defaults to picas. If you type in .0125in (the “in” for inches is very important), it will calculate that measurement in picas. If you would prefer to work in inches, another solution is to go to Preferences > General > Units & Increments. In the Ruler Units block, the Horizontal and Vertical should have the Inches option selected.
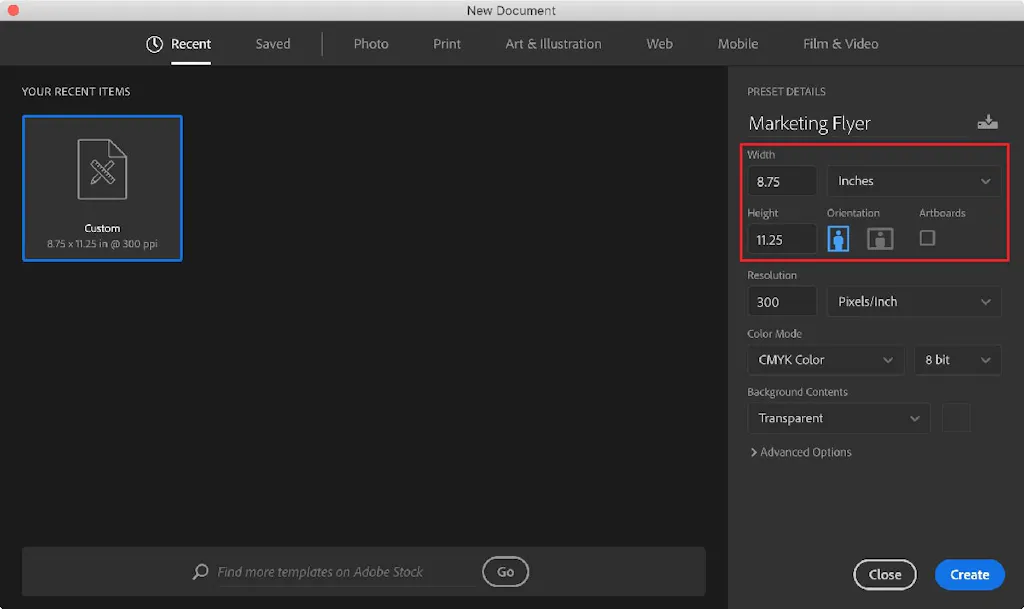
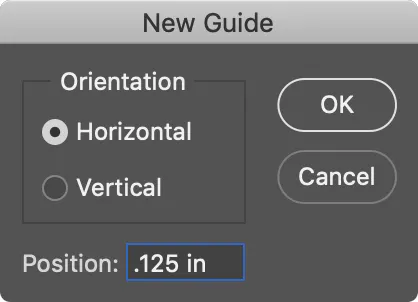
Where to Find Bleed Setup in Photoshop
Setting up the correct document size takes a little bit of math. Unlike InDesign, there is not a default bleed setting. For example, if you’d like to create an 8.5″ x 11″ document, there will need to be an 0.125″ bleed on all four sides. Therefore, the document size will need to be 8.75″ x 11.25″ in size.
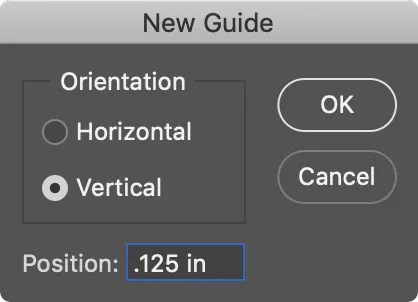
Smartpress Tip: To see helpful guides that show the actual product dimensions, go to View > New Guide.
If you have questions about crop and bleed marks or any of our online printing services, please contact customer service.
-

How to Set Up Your File
Wondering how to set up your file for print? Each Smartpress product includes one or more Artwork Guideline documents to demonstrate how to set up your artwork. You can find links to these files on each product page. These files are in PDF format and can be viewed and printed with Acrobat Reader. When in […]
Read more› -
Print-Ready Files
What are print-ready files? It’s one of the most common terms printers use every day, but it can mean different things. Most digital or online printers agree that there are essential elements your file needs to ensure it translates from your computer to the printing press accurately and consistently. If you’re already an Adobe InDesign […]
Read more›