Packaging InDesign Files
How to Package InDesign Files for Printing
Learn how to properly package your InDesign files for professional printing. This article walks you through essential steps like setting the correct document size and bleed, checking trim and fold lines, converting colors to CMYK and using Preflight to catch technical errors. You’ll also find tips for handling fonts, images and layers before finalizing your file with the Package feature in InDesign. Continue reading or view our checklist for how to package InDesign files for Smartpress to learn how.
A packaged InDesign file makes it easy to gather all your project’s elements, fonts and images together in one place to prepare it for print. Before packaging InDesign files, you’ll want to go through this checklist to ensure they’re ready to be sent to an online printer.
What Size Should My Print Project Be in InDesign?
Your project must be the exact size as the final print. If it’s not, the printer will scale your document to size during the prepress process.
How Do I Extend Artwork Beyond the Edges Using InDesign?
When packaging InDesign files, if you have artwork that goes off the edge of the trim line, you will need to extend the artwork beyond the edge. If you don’t have a cutting tolerance of 0.125″, you will see white slivers of space on the edges of your final piece.
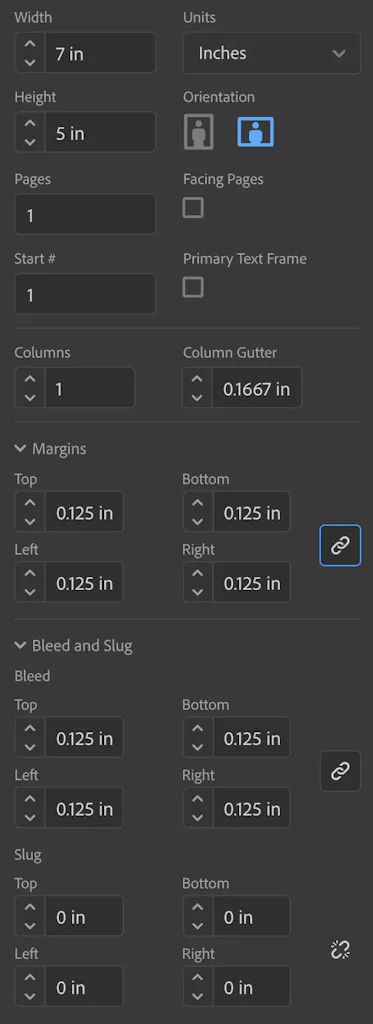
To set up your document correctly:
- Update your document size to the final size plus bleed.
- Use the margins as a guide for your final trim size.
- The artwork should bleed off (hang off) the edge of the guides and into the extra space on the document.
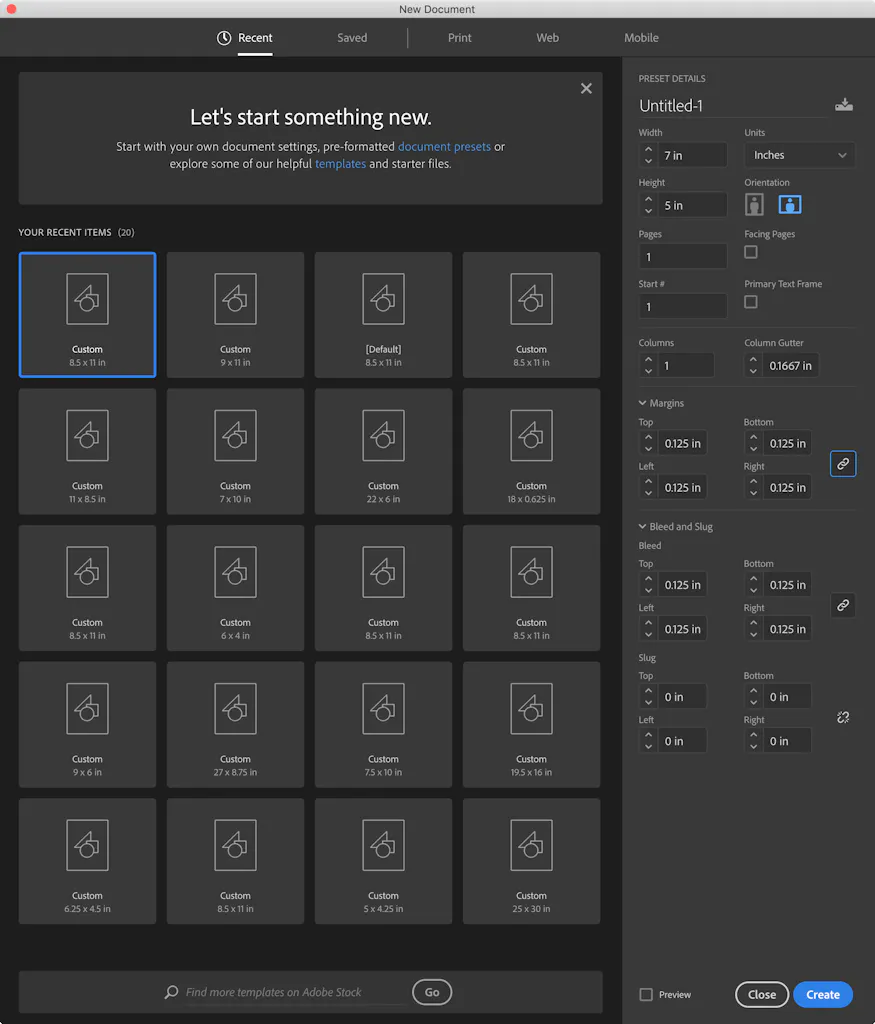
The example below is an 8″ x 5.25″ greeting card that will fold to 4″ x 5.25″. The document size is 8″ x 5.25″ with a 0.125″ bleed and the guides are used as a visual to see where the trim will be. Your order will be reviewed during the prepress process, so it will be clear the project size is 8″ x 5.25″ and there is no need for crop marks.
Smartpress Tip: The blue line is bleed, the pink link is the cut line, the green line is the safe margin and the orange line is the fold line.

Fold and Trim Line Margins for InDesign
Check that your content isn’t too close to any folds or trim lines. For online printing, if the cutting tolerance isn’t set to at least 0.125″ on the inside of your project, content could get cut off. The same goes for fold lines, as folding also has a variance of 0.125″.
Should I Change My InDesign Color Settings for Print?
Unless you have spot colors for your document, convert all of the colors to CMYK.
Proof Your Design
Check spelling and grammar. We don’t proof your content, so a second set of eyes is always helpful, especially if you’re very familiar with the content.
Convert Non-Standard Fonts
If you use any non-standard fonts, it is recommended to convert them to outlines to ensure they stay in place or make sure they’re accessible.
Declutter Your InDesign Artboard
If your artboard is cluttered, it is recommended to delete anything outside it that isn’t being used. You’ll also want to delete any unused layers, and if your document uses 15 layers total, to flatten them into one.
What is the Best Image Resolution for InDesign?
For small format printing, 300 DPI (dots per inch) is the preferred minimum.
What is InDesign Preflight? How Do I Use it?
Preflight is an important part of the proofing process, catching technical errors like missing images, fonts or overset text. To begin proofing, find this online printing service here: Window > Output > Preflight.
You may come across errors like deleted images or images or fonts that are no longer available and need replacing. These things are rare but worth checking.
After you address those items, link them with your document and run Preflight again to confirm everything is set up correctly.
How to Package InDesign Files
Now you can package your project.
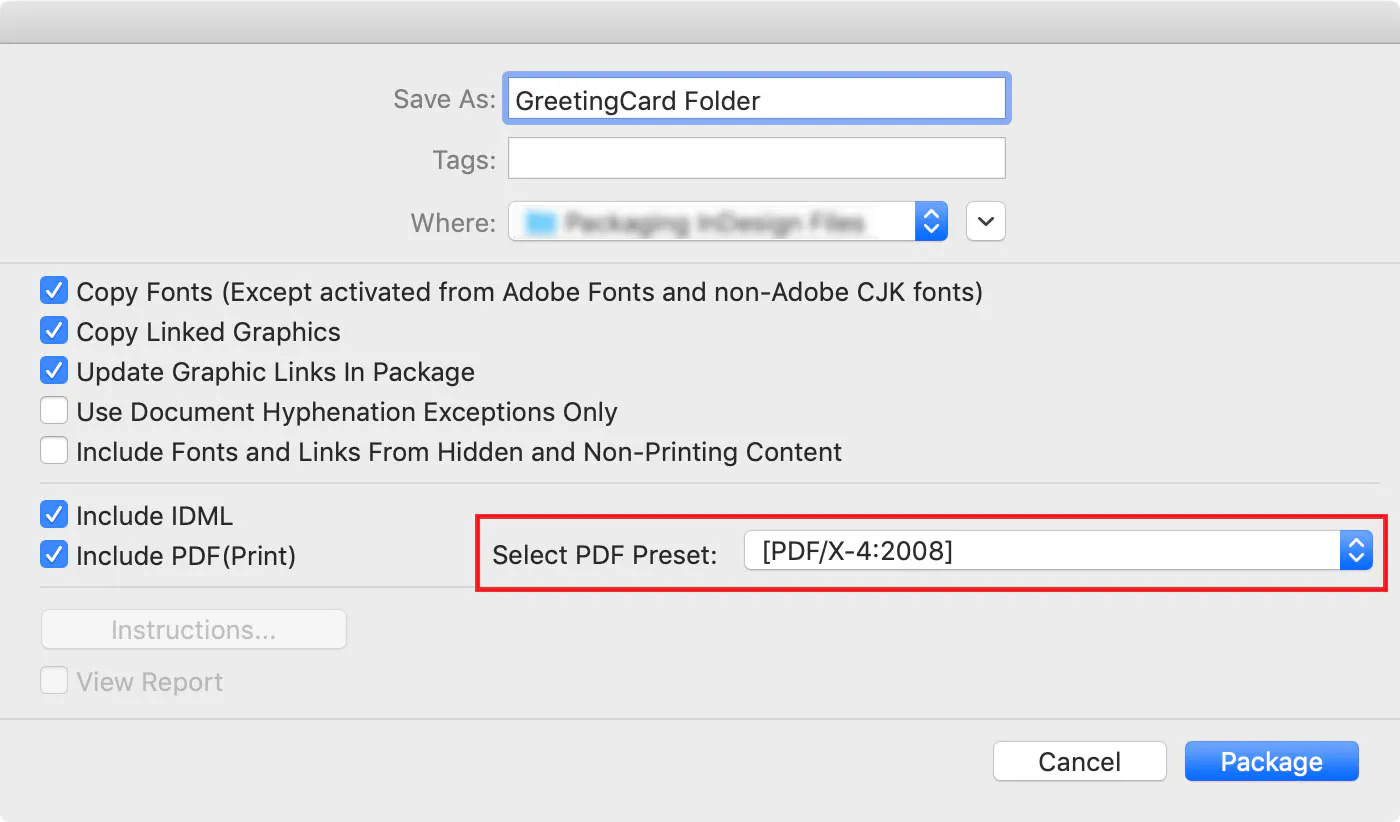
- Go to File > Package
- Review the summary for a last-minute check

- In the Select PDF Preset dropdown, choose PDF/X-4
- Click on Package
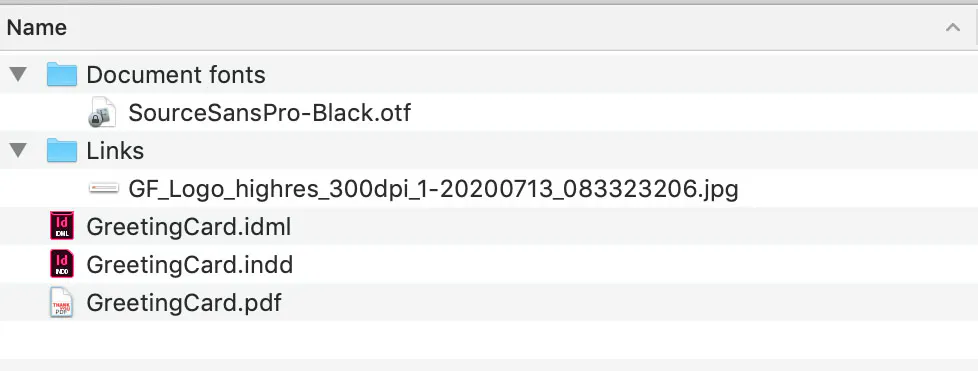
The example below shows what the package folder will look like. It has everything needed for your file to be sent to print: the original file, a PDF, all the fonts and all the image links.
If you have any additional questions about packaging InDesign files or any of Smartpress’ online printing services, please contact customer service.