
Why We’re Different: See Smartpress’ Brilliant Print Process
Ever wonder what the print process is like at Smartpress? Wonder no more! We’re pulling back the curtain and showing you how we print a booklet, from order to shipment and beyond, with stunning quality and service, plus sustainability in every step. And while it may include some digital high jinks, it also includes tons of human hands – because to us, your project is more than just a product.
Key Takeaways
- Smartpress assigns dedicated account specialists and project coordinators to each order, ensuring a high-touch, human-centric experience throughout the print process.
- From prepress file checks to foil application, binding and final shipping, every stage is handled with precision, quality control and sustainability in mind.
- Smartpress maintains ongoing communication with clients via activity logs, chats and calls for a truly collaborative process.
Step 1: Place the Order
For this order, we’re not following the path of just any custom booklet. We’re following our specialty Foil Perfect Bound Booklet. So, first thing’s first: placing the order for online printing at Smartpress.
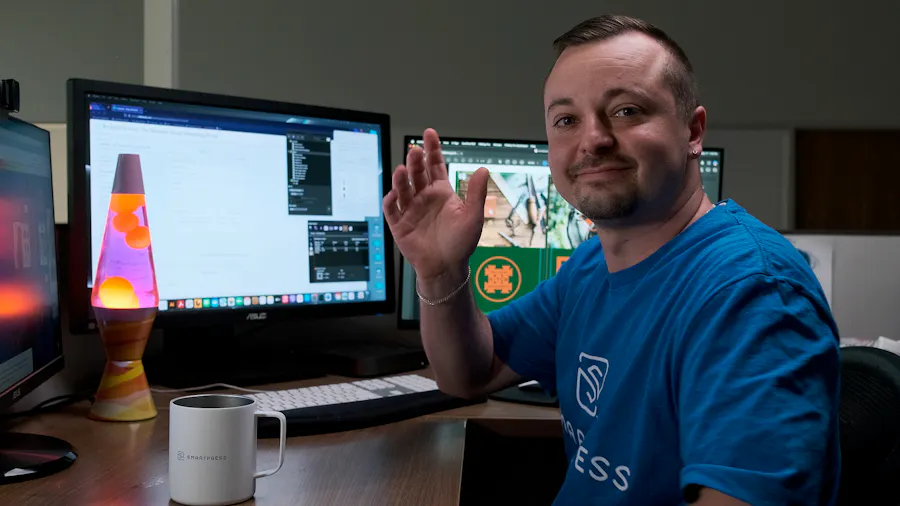
If you’re a new customer, you’re automatically assigned to one of our account specialists, an expert who’ll be by your side through the whole process. You could think of it as a virtual hand-hold, but you don’t have to.
If you’ve printed with us several times, you’ll work with the same account executive you’ve had in the past. You already have a relationship with that person, and we wouldn’t dream of breaking up the band.
To start, a customer experience specialist (or CES) assigns your order to a project coordinator (we call them PCs). If you’re ahead of the game and have already reached out to us with questions via email, phone or chat, the PC or CES will respond (a real person, yay!). No questions? Then your order is off to Prepress, where a technician picks it up and processes your file.
Hint: Not sure how to order (or reorder)? We’ve got a step-by-step breakdown right here: How to Order at Smartpress.
Step 2: Prepress
This whole thing really kicks off in Prepress. Prepress technicians do the crucial work of setting you up for order success. They’re print process heroes, only they don’t wear capes (but they’re definitely allowed to). Here’s how it goes:
- The prepress technician opens your PDF and conducts a preflight report to ensure your file(s) is set up correctly and looks for any issues (things like low image resolution, missing fonts, incorrect or missing bleed, spread, spine size, foil layer, etc.).
For custom booklet printing, there will be two print-ready files: one for interior pages and one for cover pages. The prepress technician proofs both, comparing all the specs to your order ticket to ensure they match. - If all is correct, they send a notification to you via your Activity Log.
- If there are issues (hey, it happens to the best of us), the prepress technician and PC collaborate to resolve them with you. Through phone calls or your Activity Log, the PC helps you through issues like incorrect size, changes to paper stocks or shipping speed, requesting a hard proof and so much more.
(Pro Tip: While you may get emails about communication in your Activity Log, you shouldn’t respond to those emails – they’re automated and not monitored. Instead, log in to your Smartpress account and respond in your Activity Log there. Your PC will then respond within two to four hours. - Once any and all issues are resolved, the PC will update your order ticket and pass it back to Prepress, where a technician gives it the green light and sends you a proof.
- After you approve your proof, the PC gets a notification and does two things: sets the shipping date and sends your order to Press (or production). That second one is particularly important because that’s when production time (or turn time) begins!
(Heads Up! Turnaround time begins after you approve your proof, not when you place your order. If your order includes multiple products, you must approve all the proofs in your entire order before turn time begins.)
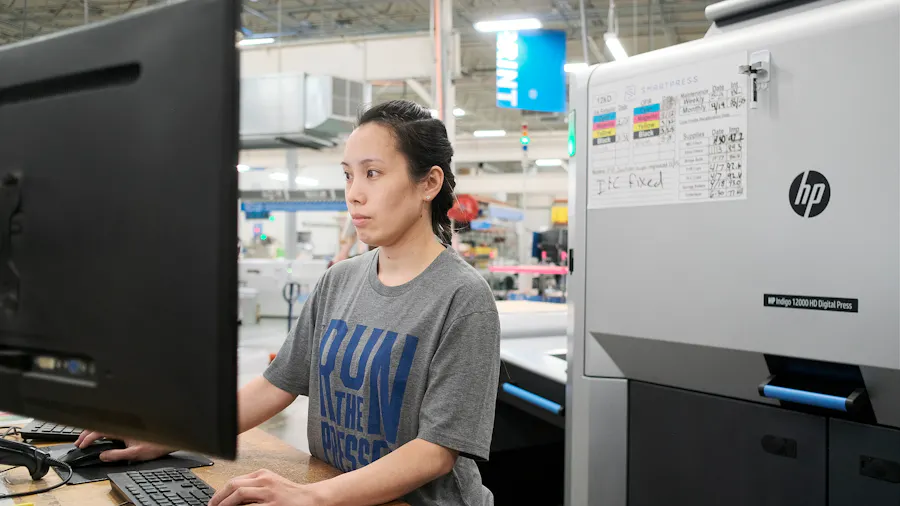
Step 3: Press
Once your order moves to Press, it goes into something called the release queue. It shows every job in our system, with every spec and operation, for every single project. It’s the center of it all, where the magic happens.
- A press lead prioritizes your project based on time-sensitive things like rush orders, turn time, number of operations and shipping method. They also “gang” orders (group projects with similar stocks together to move them efficiently through the process) before assigning projects to one of our eight print presses. (We house one of the largest fleets of HP Indigo HD presses in the world, by the way.)
- A press operator then pulls your file and proofs it once more, reading through your order ticket, reviewing your PDF for specifications and previewing your project’s upcoming finishes (for custom booklet printing, this might be UV coating or laminates, specialty features, cuts, etc.).
- Then your project is printed! We do it as efficiently and sustainably as possible, with presses that are fully stocked (no reloading mid-print) and software that ensures we use every possible square inch of the paper stock or material.
- Color management is also closely monitored during production. Color is calibrated automatically every 1.5 hours and manually every six hours. We use software to set the color specs for your project on the press, and a press operator confirms it’s within the Pantone Matching System range (aka the sweet spot).The consistency across all of our presses ensures you don’t have to stress about reorders matching your previously printed projects – they will!
(FYI: Since custom printing projects are just that – custom – order tickets are scanned and read with every move to a new station in the process to ensure quality control at all times. This particular project will be scanned seven times!)
Step 4: Finishing
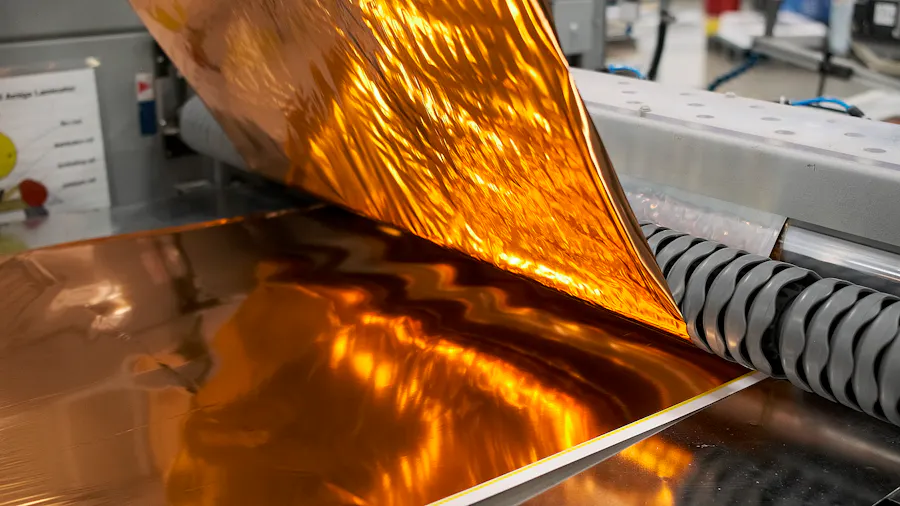
Once your project is printed, it’s off to Finishing. When you think about a booklet, you might think it’s just a bunch of pages bound in a cover, but for a Foil Perfect Bound Booklet, this is where our custom printing services really shine – literally.
- If your project has foil like our booklet, it goes to Laminating for the initial application of Soft Touch laminate, which comes standard for all projects with foil. “Soft touch laminate gives the printed piece a one-of-a-kind elevated look and feel, giving you an experience with not just your eyes, but also touch,” said Smartpress Prepress Supervisor Cecilia Oberg. “The touch is a luxurious velvet with a satin finish, making your prints stand out from the rest.”
- It’s then sent back to the press, where it’s reprinted with a base ink layer for foil. The camera on the press registers with the initial print, ensuring the foil lines up perfectly with your artwork.
- Your project then goes back to Laminating for foil printing. Our digital Sleeking™ process ensures the foil fuses to the base ink layer, not the paper, for a foil look far superior to simple metallic ink or stamping.
(DYK? At any point in the print process, communication can be happening between you and the CES, PC, prepress technician, sales rep, etc. Seriously, there’s a whole team of us checking on, processing and following your project. Based on where your project is, you can talk to experts via email, chat, phone and your Activity Log. And we encourage you to – we love “talking print” and there’s only so much our families can take.)
Hint: Want design inspo for printing custom books with foil? Here you go: Foil Book Covers: How to Put Specialty into Your Strategy.
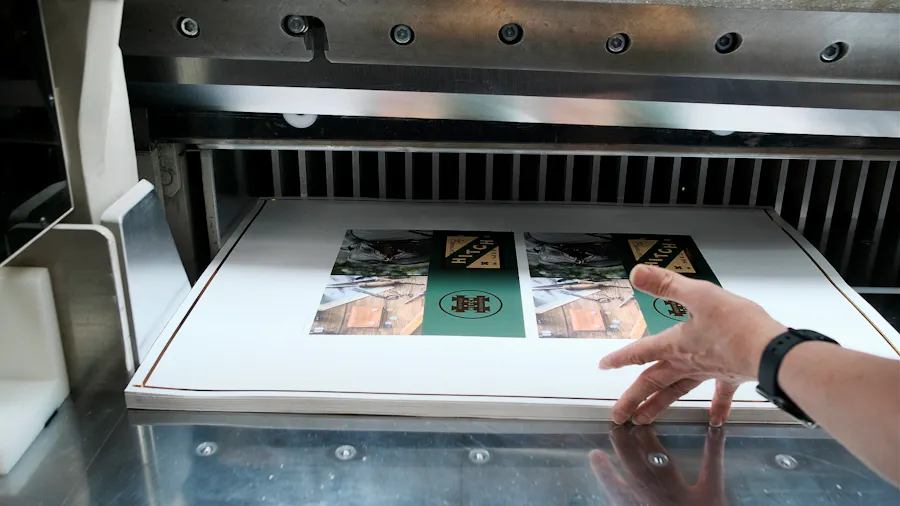
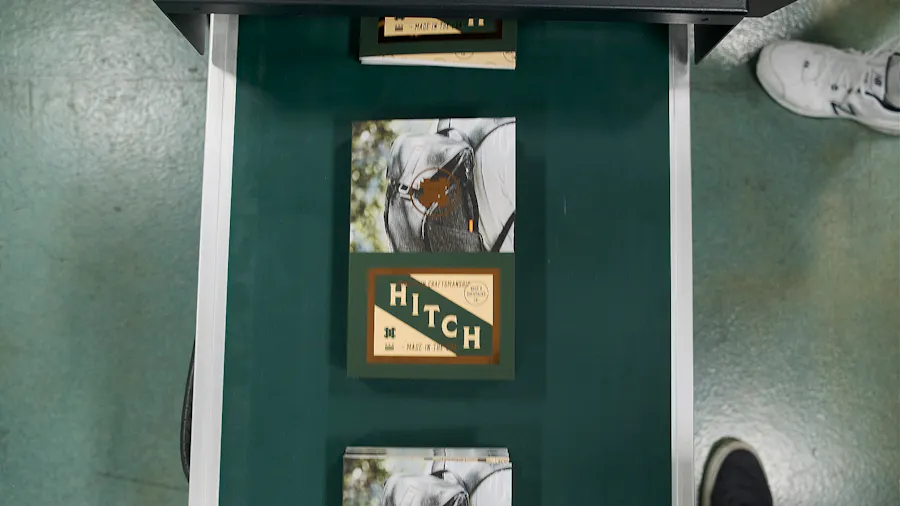
Step 5: Cutting
Next, Smartpress turns into a chop shop. A chop print shop, that is. We’ve reached Cutting, where your project takes shape (and where you might want to look out for your fingers).
- Your order ticket and PDF are checked for accuracy and any finishing operations your project just underwent. Once it’s confirmed to be correct, your project is laid out to specific cut marks for the operator of the guillotine cutter. (No cake allowed.)
- The operator enters a cutting program for a pre-existing size (for this booklet, it’s 5-1/2”W x 8-1/2”H) or creates a new program if your project is a custom size.
- The guillotine cuts the interior pages and the cover separately, and scraps get sorted into appropriate bins for recycling. Then it’s off with their heads to Binding.
Hint: Wondering about those recycled scraps? They’re sorted, along with pretty much everything else: Sustainable Solutions: Eco-Friendly Printing, Step by Step.
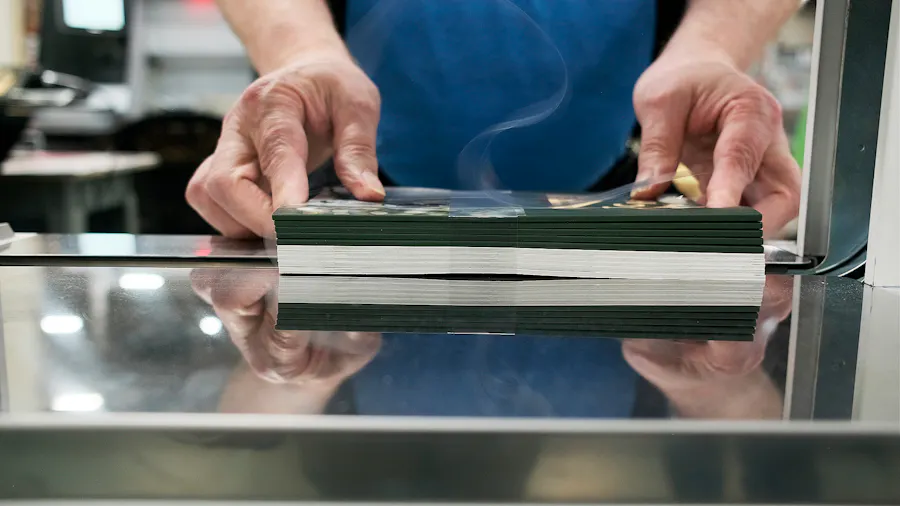
Step 6: Binding
If there’s one step in the print process you can’t skip, it’s this one. Think about how to print a booklet without a binding… you can’t! So here’s what happens:
- The booklet is loaded into our Perfect Binder machine to create a seamless square spine where the pages and cover line up exactly.
- The machine is set to the cover dimension, glue is applied, the cover is wrapped around the interior pages, and the booklet is clamped together (we can do four booklets at the same time, making large runs go all the faster).
- The booklet then goes on a conveyor to the cutting system where it’s cut to the correct size. Most scraps are once again sorted into the appropriate recycling bins.
- A belly band is wrapped around the booklet to hold it together while the glue cures for added security (this takes 24 hours). Then it’s sent to Kitting.
Hint: Learn more about arranging booklet pages, submitting spreads and more: Booklet Printing FAQ.
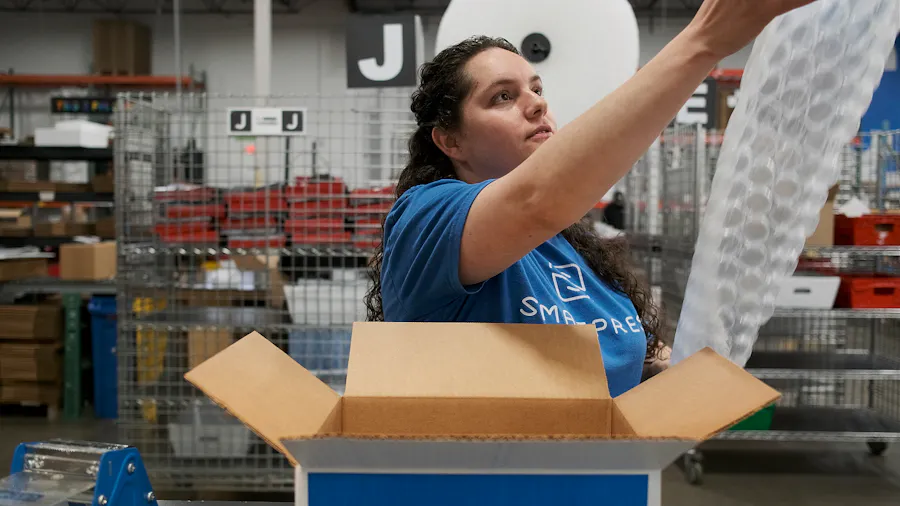
Step 7: Kitting
As a custom book printer, we offer a lot of extras for you to consider. Kitting services is one of those extras. Kitting involves grouping, packaging and shipping your items together in one unit. We bundle and assemble your entire package so you don’t have to – perfect for subscription boxes, media kits, promo items and product samples.
Depending on your project needs, you might also add shrink wrapping for products you need to have on-hand to be used throughout the year, retail products that come in sets or even branded office supplies to be used over time.
Another add-on option is variable data printing to personalize your print projects for individual recipients or for addressing and mailing. For a booklet like the one we’re following, you might feature a personalized message, tracking URL, tiered discount or QR code.
Step 8: Shipping
We’ve reached Shipping – it’s nearly the end of our print process journey. Here your project is packaged and weighed to account for any cost adjustments. The address and delivery date are confirmed and coordinated to ensure the most efficient shipping method. And if any changes or upgrades are needed, your PC (remember them from seven steps ago?) will contact you.
Then your shipping label is printed and your project is set on pallets to be picked up by FedEx. Not to brag, but… No, actually we are going to brag: Our on-time delivery score is 95-98% (anything above 90% in the print industry is something to brag about). So you can rest assured knowing your project will get to where it’s going exactly when it’s supposed to.
Step 9: Follow-up (Bonus!)
And finally, the follow-up. Our online printing services don’t stop once your project ships. It’s then that you’ll see the Print Points you earned reflected in your balance, and a team member may reach out to you to make sure your final product and your whole Smartpress experience induced a happy dance. (You can always send questions or feedback to your account rep, too.)
All that’s left is for you to submit a review on our website. And if you think it’ll just get lost in the shuffle of reviews, think again: They’re monitored and responded to by our Smartpress leadership team. Higher-ups that actually care… How refreshing.
Bookend it With Smartpress
Alright, so you’ve done it. You made it through the print process for a custom booklet. With an unmatched level of personalized attention and some seriously impressive digital wizardry, our projects and the way we create them makes Smartpress more than your average printer. And it’s no wonder why first-time customers turn into repeat clients. We’re ready to print when you are.