How to Save Your PDF
There are many ways to create and save a PDF file, but not all of them work well for professional online printing. How you create it can dramatically alter the quality of your printing. To ensure the best possible print quality at Smartpress, see how to create your file and then how to save your PDF on your Mac or PC in Adobe InDesign, Illustrator and Photoshop:
PDF Guidelines
Follow these guidelines when creating your PDF:
- Create your PDF using Adobe InDesign or Illustrator. If you have Acrobat Standard or Acrobat Professional, you can also create high-quality PDFs using the Adobe PDF printer driver from almost any program.
- You can use the built-in PDF-making functionality of Microsoft Office 2007 for Windows or Adobe PDF printer driver.
- For Mac, use the Adobe PDF printer driver in any product other than Adobe Illustrator, Photoshop or InDesign. If you do not have that:
- Go to Print Your File
- Click the PDF button
- Choose Save as PDF-X-4
- If you do not have the PDF-X option, choose the highest print quality PDF.
PDFs from InDesign
- Be sure that you’ve updated Adobe InDesign to the most current version. (We do not recommend versions prior to CS2.)
- Ensure your document contains the appropriate bleed on your print project, and set your document size to the same width and height as your final printed piece. When creating or editing document settings, set bleed to 0.125″ on all sides. (For large format items like signs, posters and canvas prints, you should set bleed to 0.25″.)
- Next, check that you’re working with the correct color settings:
- Choose Edit > Color Settings
- In Working Spaces, choose CMYK: GRACoL 2006 (ISO 12647-2:2004)
- Then create your PDF:
- Choose File > Adobe PDF Presets
- From Adobe PDF Preset, choose [PDF/X-4:2008]
- Browse and select a location and name for your file
- Click Save
- In the export window, review and modify these settings:
- From Compression, in both the Color Images and Grayscale Images sections, choose:
- Bicubic Downsampling To
- And enter 425 pixels per inch in the For Images Above field
- Then choose, Compression: ZIP
- From Compression, in both the Color Images and Grayscale Images sections, choose:
- From Marks and Bleeds, choose Use Document Bleed Settings, and ensure your document bleed now shows 0.125” on all sides.
- From Output, convert RGB and spot colors to CMYK by choosing:
- Color Conversion: Convert to Destination (Preserve Numbers)
- Destination: Coated GRACoL 2006 (ISO 12647-2:2004)
- Profile Inclusion Policy: Include Destination Profile
- Output Intent Profile Name: Coated GRACoL 2006 (ISO 12647-2:2004)
- Before you export your PDF, select Save Preset to save these settings for future Smartpress print projects.
- Click Export
PDFs From Illustrator
- Ensure your document contains the appropriate bleed on your print project, and set your document size to the same width and height as your final printed piece. When creating or editing document settings, set bleed to 0.125″ on all sides. (For large format items like signs, posters and canvas prints, you should set bleed to 0.25″.)
- Then create your PDF:
- Choose File > Save As (note that for easy uploading, you’ll want to save your file to your computer, not the Adobe Creative Cloud).
- Change the format to Adobe PDF, name your file and click Save.
- In the save window, review and modify these settings:
- From Adobe PDF Preset, choose [PDF/X-4:2008]
- From Compression, in both the Color Images and Grayscale Images sections, choose:
- Bicubic Downsampling To
- And enter 425 pixels per inch in the For Images Above field
- Then choose, Compression: ZIP
- From Marks and Bleeds, choose Use Document Bleed Settings, and ensure your document bleed now shows 0.125” on all sides.
- From Output, choose:
- Color Conversion: Convert to Destination (Preserve Numbers)
- Destination: Coated GRACoL 2006 (ISO 12647-2:2004)
- Profile Inclusion Policy: Include Destination Profile
- Output Intent Profile Name: Coated GRACoL 2006 (ISO 12647-2:2004)
- Before you save your PDF, you’ll want to save these settings for future Smartpress print projects. Do that by clicking the button next to the Adobe PDF Preset dropdown.
- Click Save PDF
- Open the PDF in Adobe Acrobat or Adobe Reader to verify that it exported properly.
- Be sure to flatten your print file:
- Create a “working version” of your file by finishing your design and saving it, just as it is, using the steps we talked about.
- Saving this “working version” is important because once the file is flattened, you can’t edit it. If you have to make changes, having this original file will save you the time of recreating your design.
- You save a flattened version of your digital print file like this:
- Click on Window, then Layers to open the Layers palette
- Click Flatten Artwork in the Layers menu
- Save this file with a different name than your working file
- This flattened PDF is the one you will submit to Smartpress
PDFs from Photoshop
- Ensure your document contains the appropriate bleed on your print project. Since Photoshop doesn’t support bleed settings like InDesign and Illustrator, you will have to add bleed to the final width and height of your document:
- Choose Image > Canvas Size
- In New Size, choose Relative and keep the Anchor centered
- Set the Width and Height values to 0.25 and choose Inches for both. This will add 0.125” of bleed on all sides.
- For large format items like signs, posters and canvas prints, you should increase Width and Height by 0.5, which will add 0.25” of bleed on all sides.
- Click Okay
- This will expand your entire document to include the appropriate bleed.
- If you have any elements that reach the edge of your artwork, be sure to extend them to fill the new bleed dimensions.
- Then create your PDF:
- Choose File > Save a Copy
- Choose Photoshop PDF (we highly recommend having the Layers box checked)
- Click Save
- In the save window, review and modify these settings:
- From Adobe PDF Preset, choose [PDF/X-4:2008]
- From Compression, choose:
- Bicubic Downsampling To
- And enter 425 pixels per inch in the For Images Above field
- Then choose, Compression: ZIP
- From Output, choose:
- Color Conversion: Convert to Destination
- Destination: Coated GRACoL 2006 (ISO 12647-2:2004)
- Profile Inclusion Policy: Include Destination Profile
- Output Intent Profile Name: Coated GRACoL 2006 (ISO 12647-2:2004)
- Before you save your PDF, select Save Preset to save these settings for future Smartpress print projects.
- Click Save PDF
- Open the PDF in Adobe Acrobat or Adobe Reader to verify that it exported properly.
PDFs from Word
The example below shows how to make a PDF with Microsoft Word.
Bleed Requirements
Please make sure that your document contains a bleed. For more information on bleeds, visit Bleed & Borders.
Bleeds of 1/8″ are required on anything small like business cards, flyers, brochures, sell sheets, newsletters or custom booklets. For larger format items, such as signs, posters and trade show graphics, a 1/4″ bleed is required.
Once you determine which type of product you are printing, make sure you account for the correct bleed when setting up your file.
Creating Your PDF
To save the file as a PDF:
- Click File, then Save As
- Select PDF from the “Save as type” list
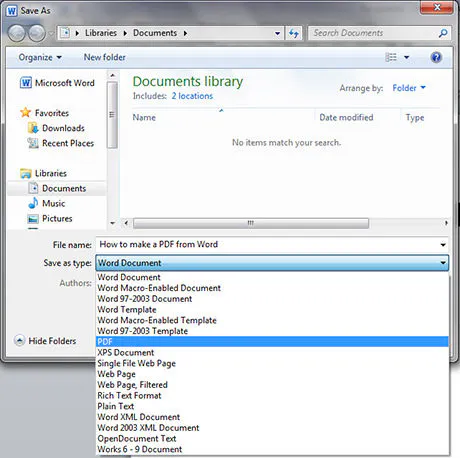
Click Options
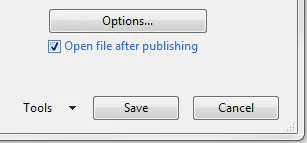
Click Print background colors and images
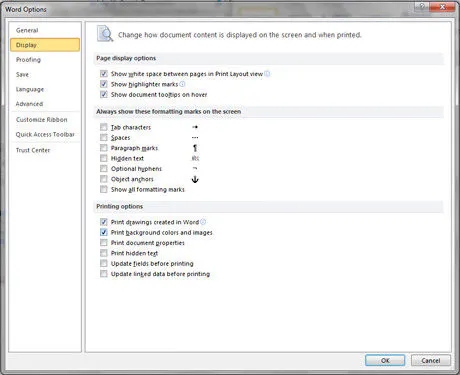
- Click OK and Save
Print with a Bleed in Word
- Open Word and create a new document
- Go to File and choose Page Setup
- Click Paper Size, then Manage Custom Sizes
- Click the plus (+) icon to add a new Custom Page Size
- Set the name and paper size to 8.75” x 11.25”
- Change all Non-printable Area values to 0 then click OK
This will bring you back to the Page Setup window and you will see Page Size now shows the custom page size you just created (8.75” x 11.25”). Click OK to confirm and you are now ready to create your design.
Once your design is completed you will need to create a PDF:
- Go to File > Print and select your Adobe PDF printer
- Open the Options, choose High-Quality Print and click Print
You now have a high-resolution PDF from Word that includes bleed. If you open the PDF in Acrobat, you will see the document size is 8.75” x 11.25” (along the bottom of the window). This means the final trim will take 1/8″ off each side to make 8.5” x 11”, which meets the requirements of your commercial printer.
Open your PDF and review it. Adobe Acrobat Reader is recommended for previewing. If you need to download Adobe Acrobat Reader, you can download it for free here. It’s always a good idea to give it a final proof for spelling, layout, etc.
PDFs from Publisher
The example below shows how to make a PDF with Microsoft Publisher.
Bleed Requirements
Please make sure that your document contains a bleed. For more information on bleeds, visit Bleed & Borders.
Bleeds of 1/8″ are required on anything small like business cards, flyers, brochures, sell sheets, newsletters or custom booklets. For larger format items, such as signs, posters and trade show graphics, a 1/4″ bleed is required.
Once you determine which type of product you are printing, make sure you account for the correct bleed when setting up your file.
Creating Your PDF
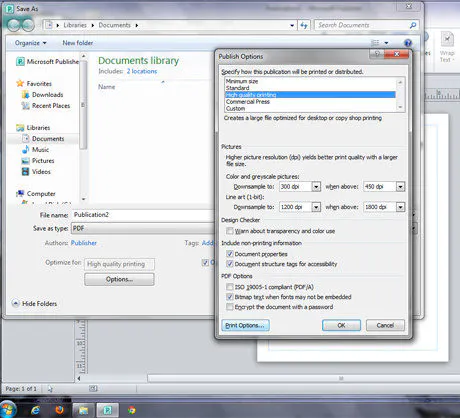
To save the file as a PDF:
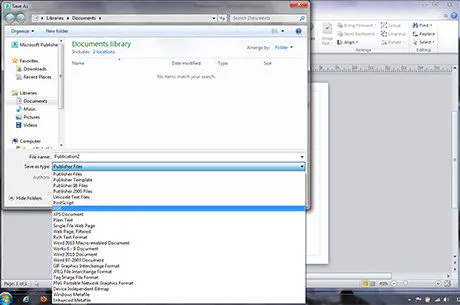
- Click File, then Save As
- Select PDF from the “Save as type” list
Click Options
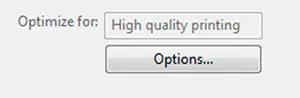
Make sure High quality printing is highlighted
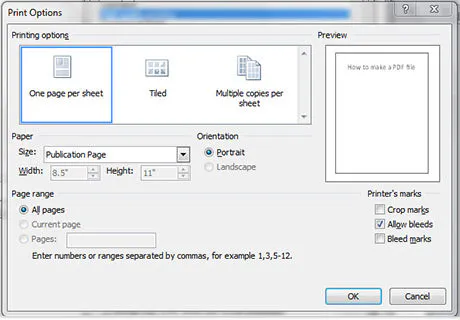
- Choose Print Options
- Choose One page per sheet
- Change the Paper Size to something large enough to account for your bleed and crop marks (e.g., for an 8.5” x 11″ document, try 8.75” x 11.25”)
- Under Printer’s Marks check the boxes for Crop Marks, Allow Bleeds and Bleed Marks
- Click OK to exit out of Print Options
- Click OK to exit out of Publish Options
- Save your PDF file to a location on your computer
Open your PDF and review it. Adobe Acrobat Reader is recommended for previewing. If you need to download Adobe Acrobat Reader, you can download it for free here. It’s always a good idea to give it a final proof for spelling, layout, etc.
PDFs from LibreOffice
The example below shows how to make a PDF with LibreOffice.
Bleed Requirements
Please make sure that your document contains a bleed. For more information on bleeds, visit Bleed & Borders.
Bleeds of 1/8″ are required on anything small like business cards, flyers, brochures, sell sheets, newsletters or custom booklets. For larger format items, such as signs, posters and trade show graphics, a 1/4″ bleed is required.
Once you determine which type of product you are printing, make sure you account for the correct bleed when setting up your file.
Creating Your PDF
To save your file as a PDF:
- Click File, then Export as PDF
- Select PDF from the “Save as type” list
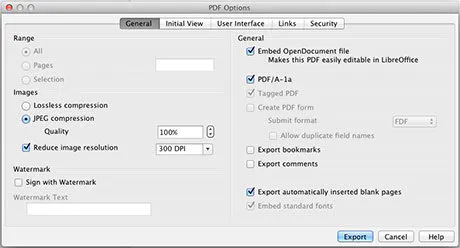
- Under the General tab make sure JPEG Compression is set to 100% and image resolution is at 300 PPI
- Check Embed OpenDocument file (this makes the PDF easily editable in LibreOffice)
- Check PDF/A-1a
- Check Export automatically inserted blank pages
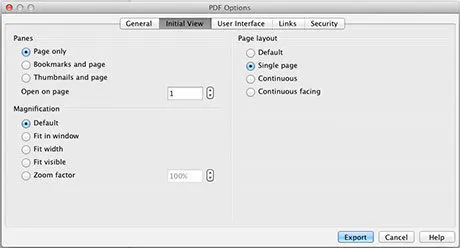
- Click the Initial View tab and select Page only under Panes
- Under Magnification, choose Default
- Under Page layout, choose Simple page
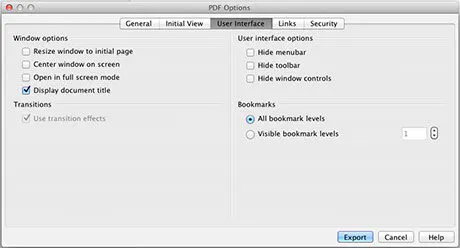
- Click the User Interface tab and select Display document title under Window options
- Under Bookmarks, choose All bookmark levels
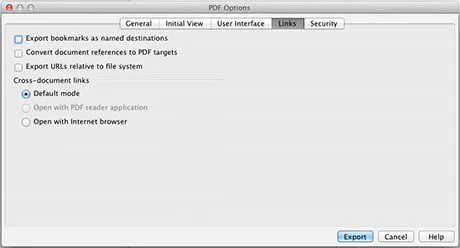
- Click the Link tab and select Default mode under Cross-document links
Open your PDF and review it. Adobe Acrobat Reader is recommended for previewing. If you need to download Adobe Acrobat Reader, you can download it for free here. It’s always a good idea to give it a final proof for spelling, layout, etc.
Other PDF Software
If you wish to attempt to create your PDF in some other product, please follow these guidelines as closely as possible:
- Set your images to 300 DPI for anything small like business cards, flyers, brochures, sell sheets, newsletters or booklets.
- For larger items, such as signs, posters, trade show graphics, set your images to 200 PPI.
- Use high-quality images with JPEG compression.
- Embed all fonts.
- If you’re including RGB images, please embed the RGB profiles. This is sometimes referred to as “tagging.” If your RGB images are not tagged with a specific profile, they will be treated as sRGB.