
Top 10 Printing FAQ: You Asked, We Answered
We say it all the time: You’ve got questions and we’ve got answers. At Smartpress, we get more than 1,000 calls, emails and online chats every week from our small-business-owning, entrepreneuring, gotta-have-this-printed-now customers. We’re happy to help whenever and with whatever, so we put together the top 10 printing FAQ we get from you, plus tips and tricks to navigate the world of online printing. (Hint: If you still need to call or online chat, that’s cool, too.)
Key Takeaways
- Print turnaround depends on when you approve your proof, not when you place your order. It includes proofing, production and shipping, with each affecting the delivery timeline.
- A successful print order starts with a properly prepared print-ready file, which is a PDF with high-resolution images, CMYK color formatting and the appropriate bleed to ensure accuracy and quality.
- From instant price quotes and order tracking to detailed setup guides for mailing and specialty features like foil and die-cutting, Smartpress provides extensive resources and personal support to help customers through every step of the printing process.
#1 – How does turnaround time work for my print order? When will it ship?
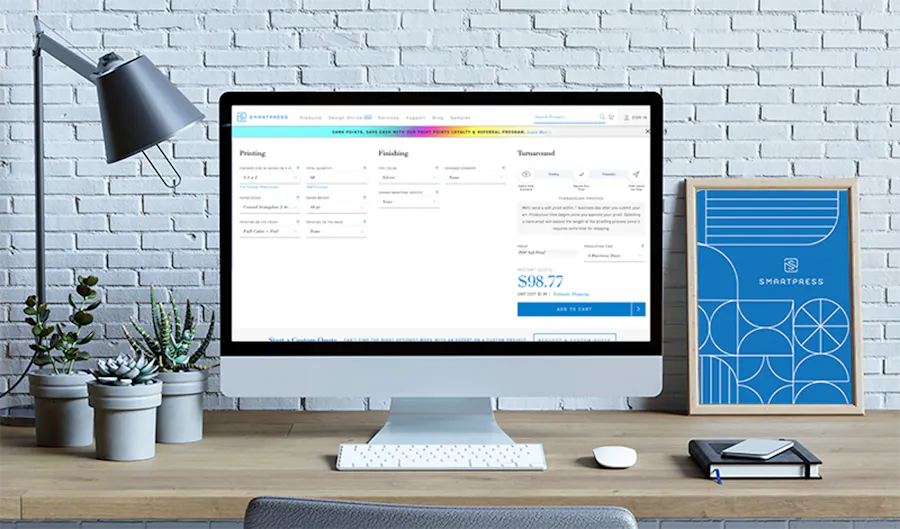
If you’d like to time the arrival of your order to your door, there are three different processes to consider: proofing time, production time and shipping speed.
At Smartpress, print turnaround time depends on how quickly you approve your print proof, not when you place your order. After you place your order, you’ll receive a PDF soft proof within two business days (3-5 days for direct mail and variable data orders).
Once you approve your proof, production begins the following business day and ships after production is completed.
If you’d like to choose your production speed, you can do that with the Production Speed dropdown on the product page (it’s right above the instant quote area). You can also select your shipping method at checkout.
Selecting overnight shipping ensures your order arrives the day after your order has been shipped. However, it does not mean your order will arrive the day after your order has been placed. (Per above, it takes our team up to two business days to proof your file, 3-5 business days with direct mail and variable data.)
Learn more: Printing Turnaround Time
#2 – How can I get a price quote for my project?
As your convenient online printing shop, we provide you with an instant quote right on the product page. As you make your stock, material, finishing and mailing selections, you’ll see the price instantly change with each specification. Find it on the right-hand side of the page.

#3 – How can I learn the status of my current project?
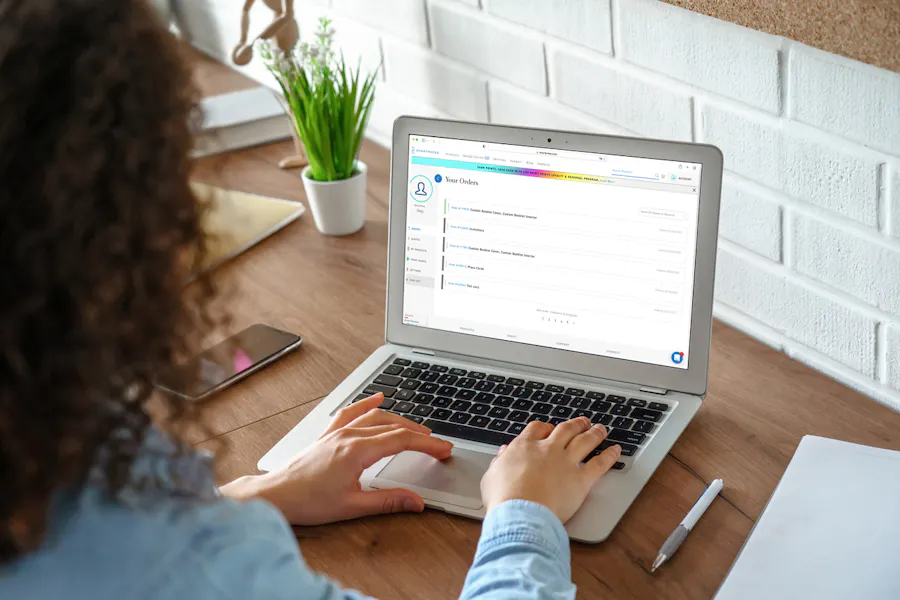
There’s nothing better than clear communication from your online printer – it’s something we know a thing or two about. Any updates and notifications can be found in your Activity Log. Use your log to review your order and determine where it is in process:
- Sign in to your Smartpress account.
- Click on your order number.
- Your Activity Log shows along the right-hand side of the page.
When we’ve added a new notification to your Activity Log, you’ll receive an email so you know about it right away. Those emails are automated, so we don’t recommend replying to them. Instead, submit your questions or requests through your Activity Log and they’ll go directly to your Project Coordinator.
Note: Your Activity Log is not a live chat. It’s monitored regularly by your Project Coordinator but it’s not a real-time communication tool. If you need to discuss anything immediately, please call or chat us online.
#4 – What is a print-ready file?
A print-ready file is essential to every Smartpress order submitted for online printing. In short, it’s a PDF with high resolution images in the CMYK color space with the appropriate bleed:
- All of your images should be high resolution. We recommend images are:
- Use CMYK colors for the most accurate comparison between what you see on your screen and what is produced with the printing press.
- Your design files must have the appropriate bleed so that any variances in production don’t affect your print. Most printers have an 1/8″ variance in case the machines drift slightly in any direction. Because of this, your finished size should be expanded by 1/4″.
“The most efficient and accurate way to bring a print project to life is by providing a print-ready file,” said Smartpress Prepress Supervisor Julia VanDalen. “This is a high-quality PDF provided to match the specifications of an order with CMYK color space, size, high-resolution images or vector art and appropriate bleed.”
#5 – What stock, weight or finish should I use for my specific project?
We know you have a lot of printing needs, so we offer a lot of printing options. And that includes premium paper stocks (including coated and recycled), text and cover weights, ultra gloss UV and flat matte coatings and velvety Soft Touch laminate.
What you choose depends on what you’re printing. Do you want to write on it? Fold it? How do you pick a coating for booklets vs. playing cards? We have you covered with FAQ for nearly every product we offer! Check them out here and find your answers: Product FAQ.
#6 – What do you need from me to place a custom direct mail order? How do I set up my mailing list and design file? Why can’t I know my postage cost right away?
We need the following to print your direct mail marketing pieces:
- A mailing list that follows our Mailing List Template in any of the following formats: CSV, TXT, XLS (Excel) and DBF.
- The top portion of the NCOA Acknowledgment Form filled out.
You can upload both your mailing list and the NCOA form when you upload any other files or artwork when placing your order.
We provide design guidelines for common creative mailers, like booklets, postcards, self-mailers and envelopes. Along with easy-to-follow templates, our guidelines include everything from size and address specifications to artwork placement, tabbing and more. Find product-specific requirements and templates here: Mailing Design Guidelines.
In order for us to provide the most accurate postage costs, our mailing team needs to “clean” your mailing list – this prevents duplicates and confirms address accuracy. From there, we’re able to confirm the final postage cost. We will not print until you approve your postage cost.
#7 – How long does it take to get a Custom Quote for my project?
Part of our wide array of online printing services, Custom Quote lets you print just about anything in just about any way you want. Don’t see what you’re looking for on our website? Simply submit a Custom Quote request! Once you do, a sales representative will provide you with a quote within 1-2 business days.
They’ll work directly with you on your order and let you know when it’s time for you to give them your artwork file. (Files cannot be uploaded with a Custom Quote.)
#8 – How do I reorder a print project?
To reorder a print project, just follow these simple steps:
- Log in to your Smartpress account.
- Select the job you’d like to reorder from the Your Orders page and use the Reorder button.
- You’ll be able to review and change your job specifications, as well as choose the same artwork or upload new files.
- When you’re finished, submit the order.
#9 – How should I set up my file for foil printing?
Our foil Sleeking™ process is a great way to add unexpected shine and excitement to any project. You can indicate foil on your print-ready file with the PDF instructions and images found here or with the steps below:
- Set up your file: Select the PDF, IDML or EPS template on the product page. Add each foil element to the Foil layer. For custom sizes, set up the document to the finished size (including bleed) and add a new layer named “Foil”. The layer can be denoted in any color, as long as the foil print is its own layer.
- Design your file: All foil elements on the Foil layers should be in the vector format with the Foil spot color to ensure a smooth finish.
- Export your file: Export the file as a layered PDF. For InDesign, select Export As PDF. For Illustrator, select Save As PDF.
- Check your PDF: Open the PDF in Acrobat to check for layers. In Acrobat, expand the Layers icon on the left and find two layers called Your Art Here and Foil.
#10 – How should I set up my file for die cutting and laser cutting?
Digital die cutting and laser cutting can be added to your file in Adobe Illustrator or Adobe InDesign. Here’s how:
Adobe Illustrator:
- In Adobe Illustrator, create a new layer on top that will contain the laser cut portions of your design. Name the layer Laser Cut. Or if your design includes die cut portions, name the layer Die Cut.
- Once this layer is in place, create a new color swatch by going to Window > Color > Swatches. The Swatch Palette will appear.
- Click in the upper right-hand corner of the Swatch Palette and select New Swatch.
- Change the Swatch Name to match the desired line type (dieline, kiss cut, etc. See the Line Type Glossary for definitions.).
- Select Spot in the Color Type dropdown menu.
- Change the Color Mode to RGB and adjust the values to match the desired line type.
- Repeat steps 2-6 for any other types of lines in your file (dieline, kiss cut, perforation, etch, etc.).
- On the Laser (or Die) Cut layer with the corresponding spot color, clearly define the shape outlines that will be cut out or etched with a .25 pt stroke weight. All lines, including perforation, should be solid not dashed.
- Be sure to leave at least 2mm between lines and create a design with enough connecting/holding points so it remains intact when the cut pieces are removed. You may include clipping masks in your printed artwork but make sure the laser-cut lines do not include clipping masks.
- Once your artwork is complete, save it as a PDF. In the PDF saving options box under Output, there is a Profile Inclusion Policy dropdown. Select Don’t Include Profiles and then click Save PDF.
Adobe InDesign:
- In Adobe InDesign, create a new layer on top that will contain the laser cut portions of your design. Name the layer Laser Cut. Or if your design includes die cut portions, name the layer Die Cut.
- Once this layer is in place, create a new color swatch by going to Window > Color > Swatches. The Swatch Palette will appear.
- Click in the upper right-hand corner of the Swatch Palette and select New Color Swatch.
- Change the Swatch Name to match the desired line type (dieline, kiss cut, etc. See the Line Type Glossary for definitions.)
- Select Spot in the Color Type dropdown menu.
- Change the Color Mode to RGB and adjust the values to match the desired line type. (See the Digital Laser cutting RGB Guide for values.)
- Repeat steps 2-6 for any other types of lines in your file (dieline, kiss cut, perforation, etch, etc.).
- On the Laser (or Die) Cut layer with the corresponding spot color, clearly define the shape outlines that will be cut out or etched with a .25 pt stroke weight. All lines, including perforation, should be solid not dashed.
- Be sure to leave at least 2mm between lines and create a design with enough connecting/holding points so it remains intact when the cut pieces are removed. You may include clipping masks in your printed artwork but make sure the laser-cut lines do not include clipping masks.
- Once your artwork is complete, save it as a PDF. In the PDF saving options box under Output, there is a Profile Inclusion Policy dropdown. Select Don’t Include Profiles and then click Export.
Still have questions about these top 10 printing FAQ or something else? We’re here for you via email (CustomerService@Smartpress.com), phone (888-934-6909) or online chat (it’s that blue icon at the bottom-right of our homepage and product pages). And if you contact us outside of our standard business hours – weekdays, 8 a.m. to 5 p.m. CST – we’ll get back to you the next business day!